
Kimchi
Sure, I’m biased but I love Kimchi. Did you know that Koreans will say “kimchi!” instead of “cheese” when taking pictures? And did you know that one of my favorite ways to have kimchi is with spaghetti?

- 3 Napa cabbage
- 2 c coarse sea salt
- 3 c Korean red pepper flakes
- 2 c julienne Korean radish
- 1 c julienne carrots
- 6 chopped green onions
- 3 sliced Korean peppers
- 1 tb baby brine shrimp
- 2 tb roasted sesame seed
- ½ onion
- ½ Asian pear (or Fuji apple)
- ⅓ c fish sauce
- 1 tb ginger
- 12 cloves of garlic
- ½ c sweet rice flour
- 2 tb sugar
- 3 c water
- In a gigantic bowl, slice your cabbage leaves and soak in cold water with salt. Turn your leaves over every 30 minutes-hour and allow it to soak for about 3 hours.
- In your second bowl, toss in your pepper flakes, radish, carrots, green onions, peppers, brine shrimp, and sesame seeds.
- In a food processor, blitz together all of your “sauce” ingredients.
- In a pan set on medium, whisk together your rice flour, sugar, and water. Cook until it thickens and bubbles. Cool completely.
- Combine your “sauce” with your second bowl and cooled rice flour mixture.
- After about 3 hours, drain and rinse your cabbage.
- Begin by pressing/massaging your paste into your leaves without squeezing. Turn it over and continue to mix with your hands until all of your paste has been incorporated.
- Sprinkle in a bit of sugar to taste {if you find it too salty} and pack in air tight containers covered with any extra “sauce” that’s left behind in the bowl. To jump start fermentation, set the container out on your counter overnight then refrigerate the next day.
I started off with 3 medium sized heads of napa cabbage

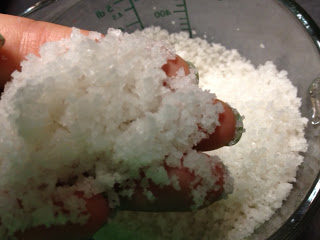
Then, you’ll want to soak your sliced cabbage leaves in a brine made of COLD water + coarse sea salt

For my 3 heads, I used 1 1/2 cups of salt and filled my gigantic bowl with plenty of water with about an inch or so on top.
*Every 30 minutes or so, you will want to turn the leaves over.*

I particularly like the addition of baby brine shrimp (this isn’t necessary and you can make this entire kimchi vegan by subbing the fish sauce/shrimp for soy sauce, but I find that the taste is never the same).

This is what your paste will begin with:

- 3 c pepper flakes (the bag from yesterdays haul)
- 2 c julienne Korean radish/daikon
- 1 c julienne carrots
- 6 sliced green onions
- 3 sliced Korean hot peppers
- 1 tb baby brine shrimp
- 2 tb roasted sesame seed
To this “bed,” you’ll also be adding this mixture (using a food processor to blitz the whole thing makes life so much easier)!

- 1/2 onion
- 1/2 Asian pear or Fuji apple
- 1/3 c fish sauce
- 1 tb ginger
- 12 garlic cloves
Add this to your “paste bowl”

Mix it well and it’ll look like this:

The final step for the paste (I promise)
You’ll also be adding a rice flour base to this as well (totally optional but I like it because it adds a very nice texture to the kimchi and really helps to adhere the sauce onto the wet cabbage).

Love this stuff! You can make mochi and kimchi with it!!

Combine 1/2 c sweet rice flour + 2 tb sugar + 3 c water …whisk constantly with the heat set on medium and cook until it thickens and bubbles. It will coat a spoon like this when it’s ready.
*Make sure the rice flour “sauce” is cooled down before adding it to your red paste:

Combine well.
*After 3 hours or so, your cabbage should be nicely wilted. Drain and rinse a couple times.
You’re now ready to pile on your paste.

Shielding your hands with gloves is important as even people with non sensitive skin will find all the pepper action to become irritating and can sometimes stain.
Work the paste in with your hands–the heat from your hands will nicely press and melt the paste into the leaves. Massage and turn—repeat and repeat.
It will be done when it looks like this:

Additionally, you may also add raw oysters or squid at this point.
Leave your kimchi on your counter top for a day or so then transfer it to your fridge (unless you’ve added raw seafood–in this case keep it in your fridge and allow it to begin fermenting with the cabbage). I personally keep my kimchi for 3 months or so then turn the leftover bits into kimchi jjigae (which fares very well with deeply fermented, soured kimchi– (though in Korea, there are traditional spots that serve kimchi that is several years old and according to my Pops, kimchi never goes bad) I suppose it depends on personal preference/taste. If you’d like to extend the shelf life, make sure you prevent any molding by turning your kimchi often. With your hands or tongs, rotate the bottom kimchi to the top often. Also, if you’re used to store bought kimchi, it’s more than likely chock full of preservatives. This should last you a bit longer.
*Reserve 1 cup to make another dish!*
I used mine to make a quick spicy cabbage slaw! (No need to salt, just rub in the left over paste and TADA)!

I made about 2 cups with the leftover paste and since yesterday, it’s disappeared. I ate mine like a salad with a grilled bratwurst. YUUUUM!!!
‹ Happy Asian New Year! How to Make one Bomb Milkshake ›
Hi i was wondering if sweet rice flour and glutinous rice flour are the same? Cos i dont have sweet rice flour here
Hi Lennie, great question. Unfortunately, it’s not the same but don’t fret. Last I checked, they have it available on Amazon
Such a great recipe!
Thank you, love!
[…] My favorite brand of Kimchi is Kings Kimchi and I buy it at Whole Foods but there are lots of good options out there. Even Costco (at least here in Seattle) sells an MSG-Free Kimchi. Or, you could make it yourself. […]
Hi Angela,
For the measurement in your recipe ‘c’ means cup correct? Thanks
Yes =)
Can I use this method of kimchi, then add in fresh oyster? I see the ingredients and the steps are quite different between this kimchi recipe and the kimchi with fresh oyster recipe. :3
I’ve actually tried both and have been successful. Just make sure you don’t “jump start” fermentation with kimchi with oysters and keep it refrigerated for its duration. Good luck, Charlotte! =)