Comfort Foods

  1. Savory Jewels

    February 21, 2013 by The Squishy Monster

    Pomegranate arils always remind me of rubies and the fact that they’re edible is just a plus in my book.  Though I’m strange and always crave ice cream in the Winter, I also enjoy a nice comforting stick-to-the-ribs sort of meal like this one.  It’s much easier than one would think as most of the time it spends is in the oven making itself all fall off the bone delicious.

    How to Make Pomegranate Braised Ribs

    5.0 from 8 reviews

    Pomegranate Braised Ribs
     
    Author:

    Ingredients
    • 2 lbs short ribs
    • Salt and pepper
    • 1 onion
    • 2 carrots
    • 4 cloves garlic
    • 2 tb butter
    • 2 c pomegranate juice
    • 2 c dry red wine
    • 2 bay leaves
    • optional: sprig of fresh thyme

    Instructions
    1. Set out your meat about 20 minutes before you use them.
    2. Rinse and pat each rib dry and dredge in flour, salt and pepper.
    3. In a hot pan slicked with oil, dredge each side to develop a golden brown crust.
    4. Set aside and in the same pan, soften your veggies with the butter. Dribble in a bit of wine to deglaze the pan.
    5. In a baking dish, combine everything together and bake for 3-3½ hours at 350 until the meat is fall off the bone tender.
    6. Serve with polenta/potatoes/rice

    Some people “pre-game” before a night out.  I like to “pre-eat” before an actual dinner so I’m off to sneak another bowl before actual dinner.

    Love & gluttony ;)

    Your Squishy Monster ^.~


  2. Fast Food At Home

    February 12, 2013 by The Squishy Monster


    I went into a bit of an Asian stir fry frenzy, you see.

    …while simultaneously watching Breaking Bad to tide me over ’til Sundays The Walking Dead!

    5.0 from 3 reviews

    Chinese Take Out {3 Courses}
     
    Prep time

    Cook time

    Total time


    Author:

    Ingredients
    Chicken Fried Rice
    • 1 c Cold Rice
    • 2 Chicken Breasts, Cubed
    • 1 tb Sesame Oil
    • 2 ts Minced Garlic
    • 1 ts Grated Ginger
    • ¼ c Soy Sauce
    • 2 Eggs
    • 2 tb Butter
    • 2 c Veggies*
    • Sesame Seed or Green Onion Garnish
    Veggie Lomein
    • 2 c Pasta/Noodles (cooked off in Chicken Broth)
    • 2 tb Sesame Oil
    • 3 ts minced Garlic
    • 1 ts Grated Ginger
    • 1 tb Rice Wine Vinegar
    • 2 tb Hoisin Sauce
    • 2 tb Soy Sauce
    • 2 c Veggies*
    • Nuts or Green Onion Garnish
    Beef & Broccoli
    • 1 lb thinly shaved Beef**
    • 2 tb Soy Sauce
    • 2 tb Oyster Sauce
    • 2 ts Rice Wine
    • 2 tb Sesame Oil
    • 1 tb Brown Sugar
    • 1 tb Minced Garlic
    • 1 ts Grated Ginger
    • 2 Stalks Green Onion
    • 2 c Broccoli
    • 2 tb Cornstarch + 4 tb Water
    • Green Onion Garnish

    Instructions
    1. For your Rice, begin by gently heating up your Sesame Oil and softening your Garlic and Ginger.
    2. Toss in your cubed Chicken. Salt and pepper and cook until just opaque.
    3. Scoop in your rice drizzle over your Soy Sauce. Mix everything together.
    4. Scoot everything over to one side and softly scramble your eggs in your melted butter.
    5. Mix everything together again and tumble in your cooked veggies (or frozen). Mix/cook everything together until the veggies are done.
    6. For your Noodles, heat your Sesame Oil and drop in your Garlic and Ginger. Cook to soften.
    7. Slide in your noodles, drizzle over your Vinegar, Hoisin Sauce, and Soy Sauce and toss to coat.
    8. Mix in your Veggies and salt and pepper to taste cook until your veggies are done and garnish.
    9. For your Beef, in a large bowl combine it with your Soy Sauce, Oyster Sauce, Rice Wine, Sesame Oil, Brown Sugar, Garlic, Ginger, and Green Onions.
    10. Set aside to marinate for at least 1 hour.
    11. Heat up your large pan (no oil and large enough as to give the Beef lots of room so it doesn’t “steam”) and cook half way through. Toss in your Broccoli. Mix/cook until everything is ready. In a separate bowl, whisk together your Cornstarch and Water. Slowly pour into your pan and let it bubble and thicken. Mix well and garnish with more Green Onions.

    Notes
    *Veggies of your choice **Ribeye or Sirloin is nice but use what you have

    Now, the big question I’m left with is, what’s for dessert?  =)

    Here’s to Chinese food minus the MSG, minus the tip, minus the wait.

    Love,

    Your Squishy Monster ^.~


  3. Things I Find Amusing +

    December 6, 2012 by The Squishy Monster

    Things I found amusing today: at a business luncheon, the gentlemen stood up for me when I went to use the restroom.  Tickled pink, I was!  It’s so rare to find organic gentlemen anymore and my friend calls a replacing phenomenon as “overt chivalry,” where now, when men display manners, they also bring with them a neon green highlighter, nearly screaming “look what I did!!”  I found more amusement when I went to refill my prescription.  I don’t know about you, but I just don’t own a fax machine so, in the end, I was actually able to text a picture of my prescription and it sufficed.  They even sent a  “thank you, have a great day” reply text.  The thing I find even more amusing is the fact that I’m amused.  My friends who are much more tech savvy than I’ll ever be are on digital clouds, streaming music that came out tomorrow and I’m not even sure what streaming is, exactly which is all the more funnier considering The Squishy Monster lives on the internet.  All I know is that her house is pink.  Last thing I found amusing today: I woke up mighty perturbed having been jolted out of my slumber by a dream of pops being chased by a vicious dinosaur.  Random much?

    Ok, enough random nonsense, let’s talk about Kimchi…

    What is Kimchi? 

    Spicy, fermented Napa cabbage.  It is on every Korean table for every meal.

    We grew up poor.  No bones about it.  Many immigrants breathlessly arrive in the States with little more than a dream in their left pocket, a photo of their loved ones in the other.  Often times, meats lined in tin cans served as our main protein.  Spam, vienna sausages, tuna?  We had it all.  Both pops and mama had a knack for making things stretch.  I attribute my resourcefulness to them.  We never threw anything away, certainly not food but they had a way of making it so delicious, we were fain to devour it.

    This jjigae (stew), is a vibrant marriage of old kimchi, scraps of veggies, and whatever potted meat that’s been left lonely in your pantry.  I hope y’all can appreciate it for what it is.  To us, kimchi is as primary as the rice that we eat it with.

    How to Make Kimchi Jjigae (Soup/Stew)

    5.0 from 4 reviews

    Kimchi Jjigae (with Tuna)
     
    Prep time

    Cook time

    Total time


    Author:
    Recipe type: Soup/Stew
    Cuisine: Korean

    Ingredients
    • 4 strips of chopped Bacon
    • 2 ts minced Garlic
    • ½ tb Korean Pepper Flakes
    • ½ sliced Onion
    • 1 c roughly chopped well fermented Kimchi
    • 1 can Tuna (packed in Olive Oil)
    • 1½ c Water (or Chicken Broth) + 1 c Kimchi Broth
    • ¼ block of cubed Tofu
    • Green Onions (to scatter)
    • Optional: Glass Noodles

    Instructions
    1. Fry your bacon.
    2. Stir in your onion, garlic, and pepper flakes.
    3. Add your kimchi and allow it to soften a bit.
    4. Tumble in your tuna.
    5. Tip in your liquids. Allow it to bubble.
    6. Top with tofu and sprinkle with lots of green onions.

    Notes
    Additionally, you could boil this together with pork neck bones, brisket, seafood (really anything you’d like).

     How to make Kimchi

    How to make a different kind of Kimchi

    How to make Radish Kimchi

    How to make Kimchi Braised Chicken

    How to make Kimchi Fried Rice

    How to make Kimchi Pancakes

    How to make Kimchi Sausage Potstickers

    How to make Kimchi Soba Noodles

    Love & lots of Kimchi!

    Your Squishy Monster ^.~


  4. When Life Gives You Pumpkins

    November 17, 2012 by The Squishy Monster

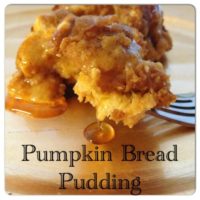
    I don’t know about you, but one of my favorite things to do on Saturday mornings (aside from indulging in a hot and hearty breakfast while watching Saturday morning cartoons), is to wander around the local Farmers Market.  This particular morning, I stumbled upon cute little Sugar Pumpkins, just begging to come home with me.  The fact that they were half off only sweetened the deal.  I couldn’t resist!  So today, I bring you Pumpkin Bread Pudding.  (Another sure delight for your Thanksgiving table).

    How to Make Pumpkin Bread Pudding

    5.0 from 3 reviews

    Pumpkin Bread Pudding
     
    Prep time

    Cook time

    Total time


    Author:

    Ingredients
    • 2 c Half/Half (or equal parts whole milk and whole cream)
    • 4 room temperature Eggs
    • ½ c Brown Sugar
    • ¼ c Honey or Maple Syrup
    • 2 tb Frangelico or Bourbon (can omit)
    • 15 oz Fresh Pumpkin Puree
    • ½ tb Pumpkin Spice
    • 1 loaf day old Challah or Brioche
    • Butter for your dish

    Instructions
    1. Cube your bread and toss into a well buttered baking dish.
    2. Whisk together all of your other ingredients and slowly pour over your bread.
    3. Allow your custard to soak in for 20 minutes.
    4. Set your dish into a larger baking dish and fill with hot water half way up its sides.
    5. Bake at 350 for 35-45 minutes.


    Watch my Stuffed Sweet Potato Cupcakes Video to learn how to blitz your own Pumpkin/Butternut Squash/Sweet Potato puree!

    …and here’s how to make your own Pumpkin Spice:

    5.0 from 3 reviews

    Pumpkin Spice DIY
     
    Prep time

    Total time


    Author:

    Ingredients
    • 2 tb Cinnamon
    • 2 ts Ginger
    • 3 ts Nutmeg
    • ½ ts Allspice
    • ½ ts Cloves
    • ⅛ ts Cardamom

    Instructions
    1. Mix everything together. I like to store mine in a mason jar.
    2. {It’s best to grind whole spices in a spice grinder, but you can get away with using jarred spices}


    Love & Sweet Saturday Mornings,

    Your Squishy Monster ^.~


  5. Apple Pickin’ and

    October 18, 2012 by The Squishy Monster

    Since I can no longer go trick or treating, this was my version of festive October fun.  I always had homemade costumes as a kid and went as a princess several times.  What would you dress up as?

    {Gala Apples}

    {Stayman Winesap}

    Apple Cider Donuts

    Apple Cider Donuts
     
    Prep time

    Cook time

    Total time


    Author:

    Ingredients
    • 10.5 g Yeast
    • 1⅓ c Apple Cider
    • 60 g melted unsalted Butter
    • ½ c whole Milk
    • 84.5 g Sugar
    • 2 Eggs
    • 470 g Flour
    • ½ ts fine Salt
    • 1 ts Baking Powder
    • ½ ts Baking Soda
    • ½ ts Cinnamon
    • ⅛ ts Nutmeg
    • ⅛ ts Allspice
    • ⅛ ts Cloves
    • Oil or Shortening for Frying
    Glaze
    • 3 c Powdered Sugar
    • ½ c Apple Cider

    Instructions
    1. Gently warm your Apple Cider but make sure it’s not hot or it will kill your yeast. Sprinkle in your yeast. (Mine read at about 105)
    2. In a mixer, tip in all the following: Butter, Milk, Sugar, and Eggs. Mix to combine.
    3. In a separate bowl, weigh out and sift your Flour, Salt, Baking Powder/Soda, and Spices.
    4. In 3 or 4 separate additions, combine your Flour mixture with your wet mixture.
    5. Cover with a towel and allow your dough to rest for 60 minutes in a warm/draft free place. (A cold oven or pantry works fine).
    6. Afterwards, on a lightly floured surface, knead your dough for about 5 minutes. You want to make sure you don’t add in too much flour or your finished product will be tough and dry.
    7. Roll out your dough to about a ¼-1/2 ” thickness and cut out donut shapes.
    8. Heat up your oil to 350-375 and fry in batches. Allow to cook 1-2 minutes on each side.
    9. Scoop with a slotted spoon and allow to drain and slightly cool.
    10. To make the glaze, whisk together the Sugar and Cider. Submerge each side of your donut into the glaze and sit on a cooling rack to set.
    11. These are best eaten the day of.

    I cannot be held accountable for how many you eat.  I will happily serve as your guinea pig and tell you this much: you can eat 9 and not die ;)

    Doughnuts & Donuts,

    Love,

    Your Squishy Monster ^.~


  6. Layered & Blanketed in Sauce

    July 25, 2012 by The Squishy Monster

    Sprinkle liberally with cheese or drench in sauce and you can’t be that far from making someone very happy.  There’s something subtly elegant about a white lasagna, specked with spinach and mushrooms that jazzes up a boring weekday meal.  Paired with a leafy green salad, crusty bread, and a good glass of wine, it’s like you went out but didn’t, ya know?

    Spinach & Mushroom Lasagna


    Spinach & Mushroom Lasagna
     
    Prep time

    Cook time

    Total time


    Author:

    Ingredients
    • 1 Onion
    • 3 cloves Garlic
    • 2 c Cremini Mushrooms
    • 1½ ts dried Oregano
    • S & P
    Béchamel Sauce
    • 4 tb Butter
    • 3 tb Flour
    • 3 c warm Milk
    • Kosher Salt
    • White Pepper
    • ½ ts freshly ground Nutmeg
    • ¼ c grated Parmigiano-Reggiano Cheese
    Filling
    • 3 c whole milk Ricotta Cheese
    • 10 oz chopped Spinach
    • 2 beaten Eggs
    • 1 c grated Parmigiano-Reggiano Cheese
    • 1 c shredded Mozzarella
    • 1 box Lasagna Noodles
    • Extra Mozzarella for topping.

    Instructions
    1. Sauté your veggies and sprinkle in your herb and seasonings. Set aside.
    2. In the same pan, melt your butter and whisk in your flour. Allow it 2 minutes or so to cook off the raw flour taste and very slowly, tip in your warmed milk. Stir/Whisk vigorously. Sprinkle in your seasonings. At the last moment, stir in your cheese. Set aside.
    3. In a separate bowl, toss in all your filling ingredients. Mix and set aside.
    4. Obtain a casserole dish and begin assembling. Ladle in a bit of your sauce on the bottom, layer with pasta, smear with filling, top with your mushroom mixture, drizzle on more sauce, top with mozzarella and repeat.
    5. Bake at 350 for 35 minutes. Keep covered for the first 20 minutes.

    Even if you and a lover aren’t looking to have an intimate dinner at home together, this dish can also be utilized for the purpose of getting those darn kids to eat their veggies.  It’s like a superhero that instantly becomes anonymous via a silly little mask.  Cheese possesses the similar ability to make all those veggies instantly edible.  Try it today, thank me tomorrow ;)

    YAY for fixed laptop issues!!!

    Full & Happy,

    Your Squishy Monster


  7. Fluffy Flipped Flap Jacks

    July 14, 2012 by The Squishy Monster

    Look Ma!  I learned all about alliteration! ;)

    I’m kidding, but what I’m not kidding about is this week.  Anxiety and depression is something that I struggle with everyday but it’s been bearing its weight on me pretty heavily this week.  It’s been a mad and tumultuous week and something that I’m glad is over–ish, and glad that I experienced it to bring me to where I am now…reveling in a rare moment of clarity where I can truly enjoy simple pleasures such as swimming in a lazy cup of tea with a thick stack of warm pancakes before me, mesmerizing me with its thick glossy coat of golden maple syrup.  (It has to be the real stuff)!  Sure, the carbs don’t hurt but it’s how ever so soft and fluffy pancakes can be with its irresistible crispy edges that, when paired with Saturday morning cartoons, makes everything seem alright.  It’s like the food version of a big fluffy robe and soft cozy slippers.

    So c’mon, sink in and get lost with me (at least for a little while).

    Fluffy Buttermilk Pancakes

    Buttermilk Pancakes
     
    Prep time

    Cook time

    Total time


    Author:

    Ingredients
    • 1 c unbleached Flour
    • 3 tb Brown Sugar
    • 1½ ts Baking Powder
    • ¼ ts Baking Soda
    • ¼ ts fine Salt
    • ¼ ts Cinnamon
    • ⅛ ts freshly ground Nutmeg
    • 1 room temperature Egg
    • 1 c room temperature whole Buttermilk
    • 1 ts pure Vanilla Extract
    • Butter

    Instructions
    1. In your first bowl, gather all of your dry ingredients and sift them in. This includes your Flour, Brown Sugar, Baking Powder Baking Soda, Salt, Cinnamon and Nutmeg.
    2. In your second bowl, whisk together your Egg, Buttermilk, and Vanilla until nice and frothy (approximately 3 minutes).
    3. Slowly drizzle your second bowl into your first bowl and mix just to combine (don’t over mix, lumps are fine).
    4. In a hot skillet, melt a tablespoon or so of Butter and ladle in your batter. *Only flip once and don’t press down.*

    Notes
    Optional: ½-1 c Chocolate Chips, Blueberries, etc. It helps if you fold them in by hand at the last moment and coat them in a tablespoon or so of Flour first so they don’t sink as much


  8. True Love

    June 6, 2012 by The Squishy Monster

    I’m still waiting for it, but Chocolate Ganache and Caramel fell in love at first sight, got together and decided to live in a pie crust.  They were so in love, they didn’t even bother to wait.  They eloped to somewhere delicious and have lived in their scrumptious little abode ever since.  *sigh*  Until then, I’ll just snuggle up with a slice and hope that their yummy love/luck rubs off on me too, lol.

    You know how some things just go together, like Milk and Cookies or Rice and Kimchi?…or me and an economy size box of oreos forever and ever because I’ll never find him hahahaha.

    Jokes aside, I highly recommend sharing this Pie.  I’ve been known to consume an entire Pumpkin Pie by myself but I don’t even think I could finish this alone.

    Chocolate Ganache Caramel Pie

    Chocolate Ganache Caramel Pie
     
    Prep time

    Cook time

    Total time


    Author:

    Ingredients
    For the crust:
    • 1½ c crushed Chocolate Cookies
    • 6 tb melted Butter
    For the Chocolate Ganache:
    • ¾ c Heavy Cream
    • 1½ c semi-sweet Chocolate Chips
    • 3 ts Honey
    • 1 ts Espresso Powder
    Homemade Caramel
    • ½ c Brown Sugar
    • ¼ c granulated Sugar
    • ¼ c unsalted Butter
    • ¼ c Heavy Cream
    • 1 ts Vanilla
    Topping
    • Fleur de Sel is very nice

    Instructions
    1. Drizzle your melted Butter over your crushed Cookies and press onto the bottom of a pie/tart pan. Bake at 350 for 10 minutes. Cool completely.
    2. In a sauce pan, heat your Heavy Cream. Turn off your heat and melt in your Chocolate Chips, Honey, and Espresso.
    3. In a separate pot, slowly melt all of your Caramel ingredients on low until it reaches 234 with a candy thermometer.
    4. Layer your Ganache and Caramel into your prepared (and cooled) crust. Sprinkle Fleur de Sel on top and refrigerate for at least 4 hours before serving.

    Love at first bite,

    XOXO

    Your Squishy Monster

    p.s.

    I’m leaving for Toronto tomorrow!


  9. May 15, 2012 by The Squishy Monster

    One of my absolute favorite things to do is to peruse the aisles of my Market.  A bystander might scoff at the excruciatingly slow process of me picking up beautiful jars of this and that, just to stare, turn over in my grasp, and ponder.  The adventure of the Grocery Store begins from the get go.  Where else can you melt nuggets of softened cheese bites in your mouth proudly displayed next to ripened, local fruit, also begging to be tasted?  If Nordstrom’s started doling out Chocolate samples while you shopped, I would reconsider going shoe shopping but if not, forgettaboutit!

    My most recent trip had my eco-bags burdened with the weight of bulky Short Ribs.  I’m particularly fond of fatty striped Meats.  I’m not too fond of the incommensurate price of them.  Wearing more Bone and Fat, Short Ribs seem to have a pretty high ticket (to me) so I don’t often buy them, but alas!  These were on sale, and I’m always a sucker for sales!  In Squishy-verse, food sale = larger quantity for my belly.  I can’t even begin to express the pure joy I felt from hauling in my 4 lbs of free-range Short Ribs and smugly setting them on my counter, knowing just what to do with them…


    Rigatoni & Braised Ribs
     
    Prep time

    Cook time

    Total time


    Author:

    Ingredients
    • 4 lbs Beef Short Ribs + Flour to dredge
    • 1 Onion
    • 4 Garlic Cloves
    • 1 ts dried Thyme
    • 2 Bay Leaves
    • ¼ c Kalamata Olives
    • 1 c Roasted Red Peppers
    • 1 c Beef Broth
    • 1 c Red Wine
    • 2 tb Red Pepper Flakes
    • ½ c – 1 c reserved Pasta Water
    • ¼ c Heavy Cream
    • 1 lb Rigatoni (or Pasta shape of your choice)
    • ½ c Parmigiano Reggiano
    • ¼ c fresh Parsley

    Instructions
    1. Set out your Ribs 30 minutes prior to cooking. Rinse and dredge in a mixture of Flour, Salt, and Pepper. Shake off excess and sear all sides in a hot pan, glossed over with Canola/Veggie Oil.
    2. Remove your Ribs, set aside and in the same (completely heat proof pan-will be transferring the entire pot to the oven later), drizzle over some Olive Oil and soften your Onion, Garlic, Thyme, and Bay Leaves. Salt and Pepper. Make sure to scrape up all the delicious brown bits with your wooden spoon.
    3. Tumble in your Olives, Peppers, Broth, Wine, Pepper Flakes. Allow it to come to a fierce bubble. Salt and Pepper.
    4. Snugly fit in your Ribs into the pot and transfer to your oven, loosely covered with foil and bake at 350 for 2½-3 hours.
    5. After this time, extract your Ribs and set aside. About 20 minutes later, begin shredding with your hands or 2 forks.
    6. Take your Sauce (sans Meat) and blend it to a thick, chunky consistency with your blender/food processor. At the last moment, twirl in your Cream.
    7. Cook your Pasta and transfer to your Sauce with a slotted spoon (reserve 1 c water), and top with Cheese, directly on top of your hot Pasta. Combine.
    8. Toss in your shredded Beef with your cheesy Pasta.
    9. Pour in your Sauce, drizzle in your reserved Pasta water as needed, Salt and Pepper and sprinkle with Parsley or more Cheese.

    Notes
    This is also stellar over Polenta, Mashed Potatoes, Rice, or Buttered Egg Noodles. If you’re worried about fat, allow just your Sauce to cool a great bit and skim off the top that floats up.

    Proud to bring you some Meaty, Cheesy Goodness on a boring ole’ Tuesday!

    Love,

    Your Squishy Monster ^.^


  10. Cheesy, Meaty, Crunchy, Gooey

    May 3, 2012 by The Squishy Monster

    Bacon-Cheese-Fritters.  With all things considered, it’s hard to think you need much more beyond that.  Of course, I say this facetiously, but I don’t imagine that I’m too far off.

    This idea sprung on me one morning as I sat eating a late Breakfast of heavy, streaky slices of Bacon, topped with melted, broiled Cheese, on crunchy, golden Toast.  These Bacon Cheese Fritters are exactly what I had for Dinner that night…an echo of an earlier meal but made even more delicious with the magical properties of hot, bubbling oil.

    This is even further accessible for the fact that a). they’re super easy and b). when a generous portion of Bacon is fried off and Cheese is grated earlier in the day, half your assembling work for dinner is completed.

    Here’s how to do it:

    Bacon & Cheese Fritters

    Bacon Cheese Fritters
     
    Prep time

    Cook time

    Total time


    Author:

    Ingredients
    • 2 c Shredded Mozzarella (Smoked is very nice)
    • 8 slices of crisped Bacon
    • ½ c Italian Bread Crumbs + healthy grating of Parmigiano-Reggiano (if you have any)
    • 2 beaten Eggs
    Egg Wash
    • 2 beaten Eggs + 2 tb Cream (or full fat Milk)
    • 2 c Panko Bread Crumbs

    Instructions
    1. Combine your ingredients together in a bowl
    2. Roll a spoonful or so of your mixture into a ball
    3. Dip your ball into your Egg-wash and roll into your Panko
    4. Chill all your prepared Fritters in the Fridge for at least 30 min
    5. Fry in batches (the oil should be at 360 or so–a fry thermometer helps)
    6. Retrieve your Fritters when they’ve reached a deep, golden brown. Remember not to overcrowd the oil and to leave at least 2 inches or so on top in your heavy bottomed pan.

    Notes
    If you’d like a flavored oil, plunge a stalk of fresh Rosemary into your Oil first for a few minutes. Great “frying oils” are ones with high smoke points= Safflower, Peanut, Canola, Veggie, etc. Remember that Extra Virgin Olive Oil should never be used for frying.


    Wishing everyone a delicious and Cheesy day!

    XOXO

    Your Squishy Monster =D


  • 1

    Welcome to The Squishy Monster!

    Here, I'll share the stories of my on going love affair with food as well as step-by-step tutorials/cooking videos featuring original recipes. I'm a firm believer that despite our differences, our one commonality as humans? Food.
    I'm 100% Southern & 100% Korean. My name is Angela and my friends call me The Squishy Monster.

  • Recent Posts
  • Support "Pack Away Hunger"